The Château Bouffémont Vlog N° 008: Christmas Decorating Ideas with Laura Le Cam and Madame de la Maison
Our monthly Vlog series offers an invaluable peek behind the curtain at the Château Bouffémont to let you see how the magic really happens. The festive holiday is just around the corner – those unforgettable moments spent with our family and closest friends. That’s why this month in our private château for rent near Paris, exclusively for the Château Bouffémont Vlog, we’re talking all about Christmas decorating. Our General Manager Sarp enlists the help of florist Laura Le Cam, and Madame de le Maison providing vintage tableware, to show you just how to decorate your home for Christmas.
We’ve prepared a step-by-step guide for you to create your own floral Christmas centrepiece, along with ideas for setting your table and a few bonus tips for decorating your Christmas tree.
Laura le Cam – a talented floral designer and our go-to person for weddings and other events we host at our château– helped us to create table decoration focused on a palette of dusky rose and elegant cream tones. Read more about Laura in our interview with her – click here.
Ready to make your centrepiece? Let’s get started!
You will need:
- 1 floral foam brick and 1 floral mousse wreath from your florist
- Flowers from your florist (we used 1 hydrangea/hortensia, 2 bougainvilleas, 1 eucalyptus bunch, 5 craspedia and 2 grasses)
- 5 Christmas baubles
- Fluffy snow-like fabric
- Thin metal wire
- Hot glue gun and 2 sticks of glue
- Secateurs and a small knife
- Spray paint in your choice of colour (we used metallic pink and silver tones)
- 1 bucket of water
- 1 flat plate or cake stand as your centrepiece base
Now you’re ready to make your Christmas table centerpiece:
Step 1: Spray paint the flowers and grasses from your florist in your chosen colours. Metallic rose pink and white offers an elegant look, while gold, silver and red are truly festive.
Step 2: Using the knife, cut your foam brick to a size that will fit onto the cake stand or plate you’ve chosen to display your centrepiece. Be careful not to crush the brick while cutting.
Step 3: Soak your floral foam in water, without putting pressure on it, for about two minutes. This keeps your centrepiece watered and fresh during the whole festive period.

Step 4: Once the painted eucalyptus branches have dried, cut them into equal-sized sections using the secateurs. Then cut just the head of your hydrangeas, leaving enough of a stem to put into the foam brick.
Step 5: Place your foam brick onto your cake stand or plate and begin to stick the eucalyptus branches into the brick – push the stem in as far as you can to make sure they get lots of water.
Tip: Make sure your centrepiece does not exceed the eye level of guests at the table.
Step 6: Now do the same for the hydrangea/hortensia heads and then the grasses. Arrange everything however you please – this is your moment to get creative!
Tip: Don’t be too structured – this creates an effortless, casual elegance.
Step 7: Trim and then place the bougainvilleas and the craspedia: these add volume and texture to the arrangement.
Tip: Give the centrepiece a turn from time to time to keep it visually balanced, and ensure you’re covering all of the foam brick.
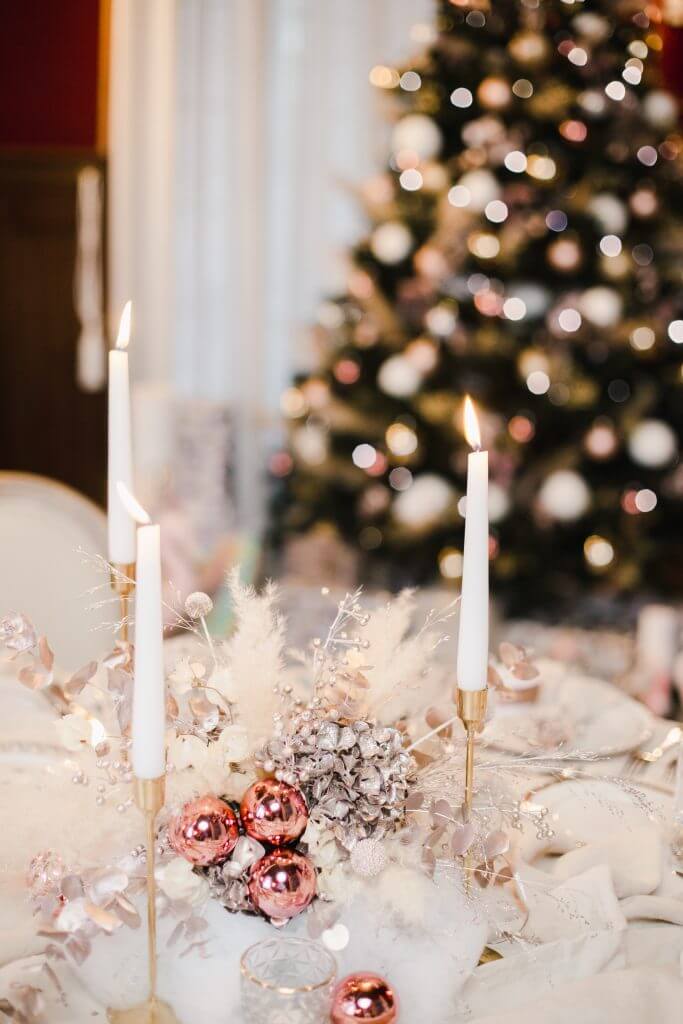
Step 8: Now you’re ready to add the baubles. Put the metal wire through the loop of the bauble, then bring the two ends together, creating a U shape that you can then push into the foam. Be spontaneous with where you place the baubles.
Step 8: Now to create the centrepiece support section. Take the round florist foam shape along with your snow-like fabric. Work the fabric with your hands to make it even fluffier, then tear off a small handful. Bend a metal wire into a U shape and push through the snow to fasten it to the round florist foam. This creates a snowy effect on your round centrepiece – do this until all of the round green foam is covered.
Step 9: Take the hot glue gun and squeeze glue onto a section of the first layer of snow-like fabric. Then place more fabric on top, to create a second layer of ‘snow’ and even more volume. Once you’ve gone all the way around, your centrepiece support is complete.
Step 10: Place your floral centrepiece, using the foam brick, into the middle of your new snowy centrepiece, so that it’s surrounded by fluffy snow.
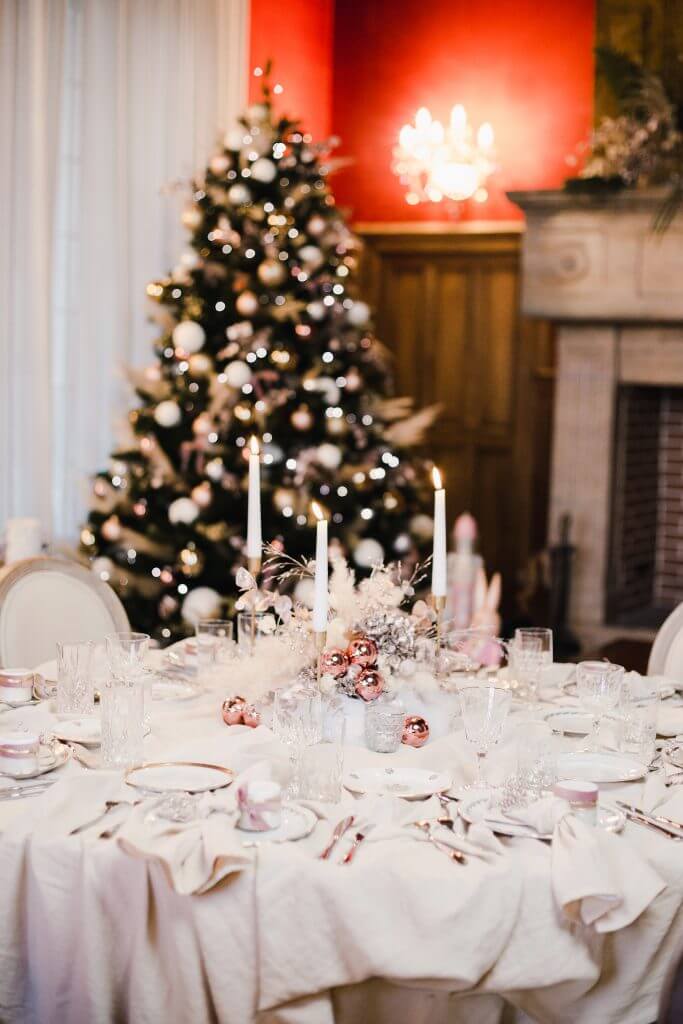
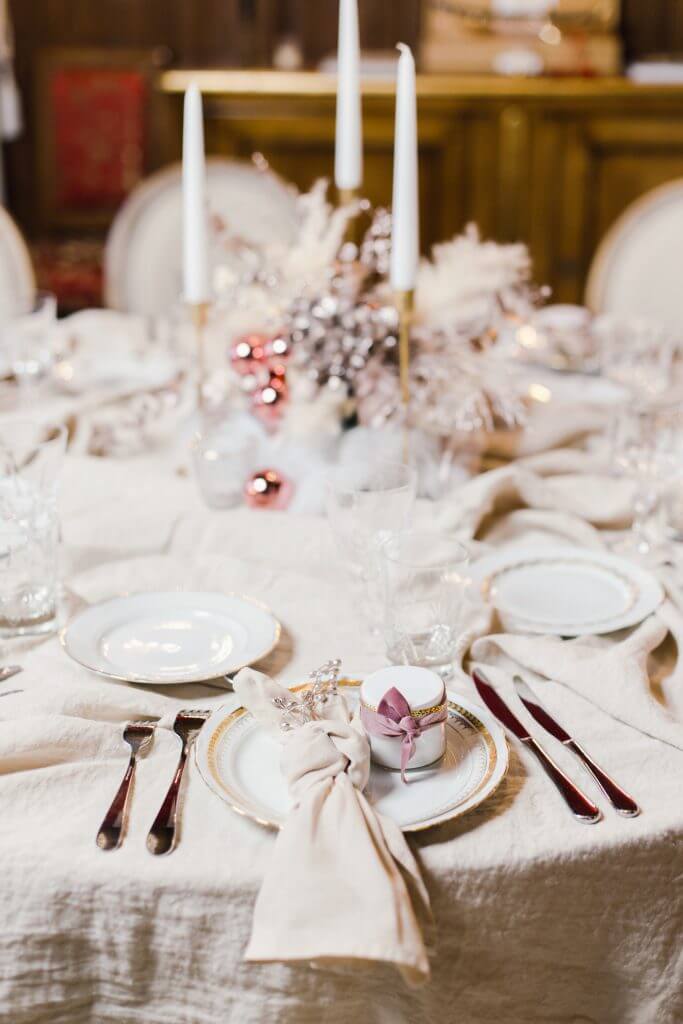
Your finished centerpiece is ready! If you have a longer table, you can make one main centrepieces and two smaller ones for the length of the table.
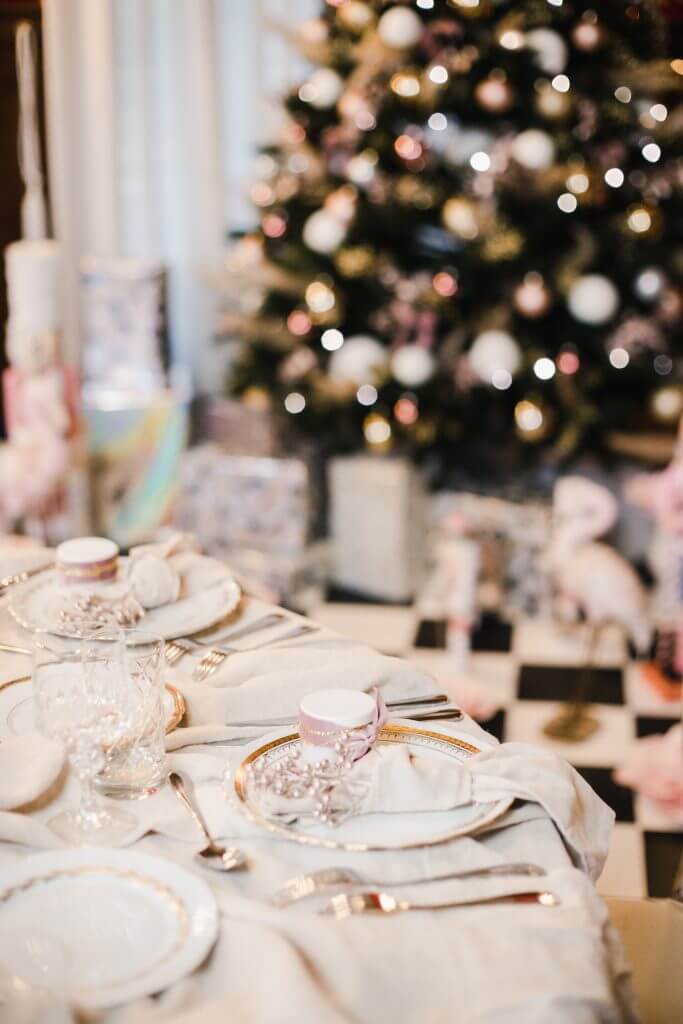
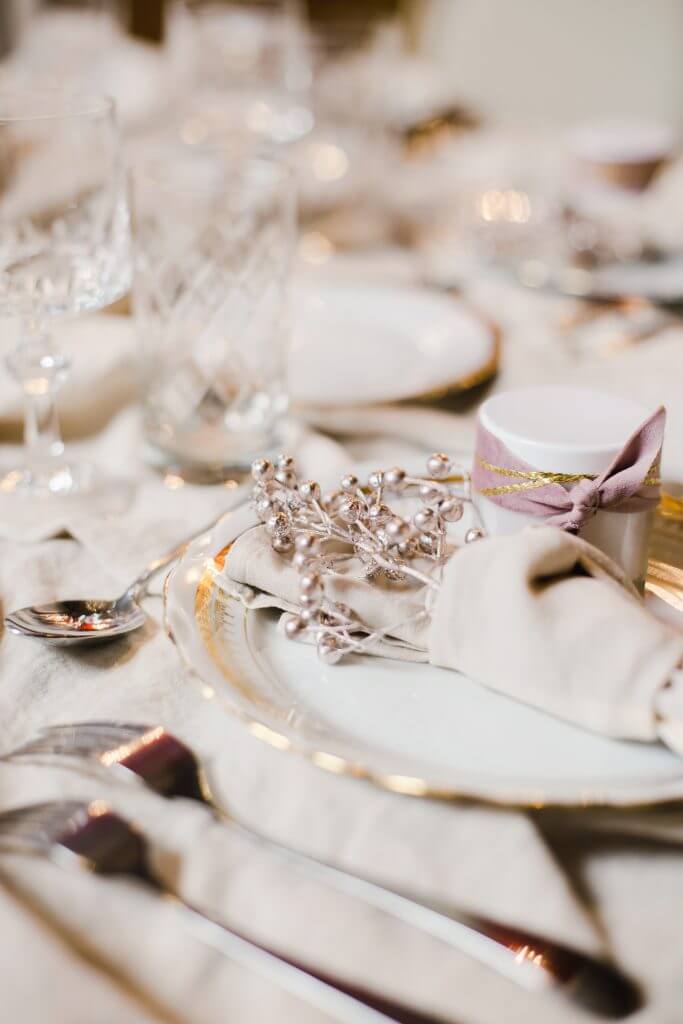
Now for the festive table setting, with the help of Laura and of course using Ajiri Aki’s chosen pieces from Madame de la Maison. She has a special taste for all vintage tableware, linen and antique tabletops.
Christmas table decorating tips:
- Cover your table with your chosen tablecloth, then loosely throw over another tablecloth and gather it in places for a textured and voluminous effect.
- Place your charger plates, along with cutlery and glassware. A little tip for your napkins: tie them with a small knot for an effortless aesthetic, then add a sprig from any florals left over from your centrepiece.
- Laura recommends adding a gift for each guest – she’s wrapped a little candle with festive ribbon for an added touch of hospitality.
Check out our vlog to see Laura making the centrepiece above, and get bonus Christmas tree decoration tips, too.
We hope you’ve enjoyed decorating your home along with us and Laura, from gathering florals to getting creative with your centrepiece. Like and subscribe to see more content from us, and we’ll see you again soon for more highlights from the castle. Until then, Merry Christmas and Happy New Year from all of us at Chateau Bouffemont!
Looking for a French château for your family vacation or a holiday? Check out our website.
Photography @kseniaparisphoto